

Add a workflow
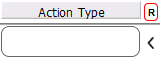
The action type is more explain in the next page.
Then enter the content of the step in the content field.
Note that this field will be different for every action type you
select.
For example, if you select an AutoResponder action type,
when you click the content field, it will let you select from the
autoresponders you have in your Auto-Responders System.
Set the number of days this step will be triggered
after the previous step.
This field will count from the previous date, so for
example, if you have 3 consecutive lines with 0 they will execute the same day
as the previous one. If there is no previous one then they will execute from
today.
You can click the Trigger On field to show the dates
based on the Days To Trigger field. If you change the number of days, click
the Trigger On field again to refresh the dates.
Enter the date the step must be
triggered
Assign the agent for this step. If you leave this
agent field empty, the agent that created the step will be
assigned.
You can also set additional conditions at the bottom of the workflow screen